Monday 30 November 2009

The jacket outfits

Rather than bore you with another 20 photos of all my outfits with the jacket here are five looks that show every garment to demonstrate the all 'go' with the jacket.

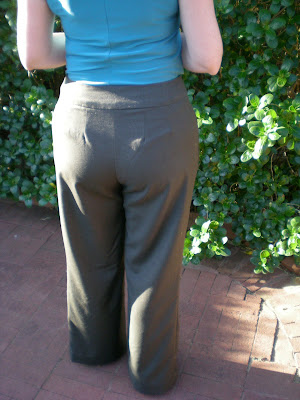
Ivory tunic and olive pants.

Cream t-shirt and navy skirt.
Teal t-shirt and taupe skirt.Floral blouse and olive skirt.
Cowl-neck top and olive pants.

Wardrobe Comp Review - McCalls M4972

The finished jacket. What do you think? I must say I am pretty happy with how it turned out.

This is the 10th and final piece for the wardrobe competition. I used McCall's M4972 (now OOP).


Pattern Description:
Princess seam jacket has trim variations and curved or squared front opening edges.

Pattern Sizing:
I made a 12.

Did it look like the photo/drawing on the pattern envelope once you were done sewing with it?
I sorta made view B and it more or less looks like the picture.

Were the instructions easy to follow?
I didn't use them at all. I used a combination of instructions from the two well-known threads articles on Chanel jackets. One shows the fully couture methods and the other give shortcuts.


First I sewed the vertical body seams in the shell and the lining then ditch-stitched and quilted the layers together. I sewed the shoulders seams in the jacket by machine and the lining by hand.


Next I laid on a folded bias strip of lining and hand sewed it down. Then I attached the centre of a bias strip of jacket fabric to the seam line all around the outside. I turned the seam allowances in and the two layers of tweed trim out and hand sewed the lining all around the inside edge of the jacket.

The first row of trim - bias strips of the lining laid around the edge.
I sewed the back seam in the sleeve and quilted the lining as for the body, then sewed the front seam of the jacket by machine and the lining by hand. I turned in 1.5cm on the lower edge of the sleeve and hand sewed down the lining.

Here is the sleeve after quilting (and clearly before pressing).
I machine stitched the sleeve in and bound the seam with bias.


Hook and eye on the front and chain in the lower edge and voila! A Chanel style jacket.

The finishing touch - a chain in the hem.


What did you particularly like or dislike about the pattern?
It was a great starting point as I didn't have to alter the design for the look. I like the low front which works better with the tops in my wardrobe. Plus a high round neck makes my chin look flabby!

Fabric Used:
Handwoven silk tweed for the body. Silk satin for the lining

Pattern Alterations or any design changes you made:
I narrowed the upper back, made a sway back alteration, a small fba and added a little room at the hip.


In terms of design changes, I left off the ruffle on the sleeve as I figured it would get grubby and I also left off the pockets. It was all a bit too much 'look' for me!

Would you sew it again? Would you recommend it to others?
Would I sew a Chanel style jacket again? Yes. Would I do it better? Yes. Would I use this pattern? Maybe (there's nothing wrong with it, there are just so many great jacket patterns). Would I recommend it? Yes, definitely.


Conclusion:
This jacket was hard work! If I didn't have a deadline I'm not sure I would have persevered. But I am so glad I did. I think it looks great and I just hope I've done justice to the beautiful fabric and to the designer who inspired it!

The finished inside jacket front...

And back.

Sunday 29 November 2009

Pants-related outfits

Almost there, just the jacket to go...


My dear friend Sarah is always paying me out about how rubbish my photos are. I have an old camera, no garden, my house is still a 'fixer-upper' and I only have a dim courtyard to pose in. So today's photos are shot by Sarah in her garden (garden created by Cam). Thanks Sarah, and I hope you like them better than my normal pics.


Here are all the tops paired with the olive pants.


Sneak preview of the jacket here.


And another look at the jacket! Don't worry it's own review is coming...


So this is the last of the 20 base outfits all of which can also be worn with the jacket. I therefore now have a total of 40 lovely new outfits to wear to work - and I can retire some old favourites. Yay me!

Wardrobe Comp Review - Simplicity 2700

Finally the pants are done!
Don't worry, the wrinkles are just from the way I am standing!

The pattern is Simplicity 2700 the 'amazing fit' bootleg pants.

Pattern Description:
Amazing fit bootleg pants.

Pattern Sizing:
The pattern comes in the usual range of sizes but has different pattern pieces for slim, average and curvy figures. I started with size 14 and you know I picked curvy!

Did it look like the photo/drawing on the pattern envelope once you were done sewing with it?
Yes, except mine don't look so much like nanna-pants.

Were the instructions easy to follow?
Well, as it happened I mislaid the second pattern page when I was making these up so I was on my own after the pockets! I couldn't do it their way anyway as I added a lining to my pants. I did try out their fly instructions when I made my toile but it turned out terrible. On my proper pants I used the instructions in a Threads magazine which, imho are idiot-proof.

Here is the finished fly. I don't know why but I am loving squared-off fly stitching lately!

What did you particularly like or dislike about the pattern?
I liked that it promised to fit me. Aside from that they are pretty generic pants but I am glad they have pockets, we are having a terrible hay fever season this year!

Fabric Used:
Mystery suiting. It says 'cashmere and mink' on the selvedge but I wouldn't bet on it. More likely a wool blend of some kind. It is very lightweight and has a lovely drape.

Pattern Alterations or any design changes you made:
LOADS of alterations - but due to the body not the pattern. You can read about my struggles here. But it was worth it.

Oh yeah, and I cut the fly extension on with the front and lengthened the legs by 5cm.

Would you sew it again? Would you recommend it to others?
I will almost certainly make these again, or at least use the pattern to adapt other patterns to fit. What I ended up with looked nothing like the original pattern so it's no wonder I haven't been able to get pants to fit before!

Conclusion:
I am so happy to finally have a pants pattern that works. I know it is not perfect yet but I am not far off so I can't wait to fine tune it further. Long live the TNT pattern!

Sorry guys but you know there has to be a butt-shot. There is still some extra fabric below the seat but it disappears when I'm walking.

Here's my little 'design feature'. Using the threads article for my fly somehow caused me to end up with my left waistband piece too short. I just bound the edge with some contrast binding.

Quick update

I have officially completed the wardrobe challenge - phew! I'll be getting photos of the last two garments and some final outfits this afternoon so the reviews aren't far off (well they have to be done by the 30th so I'd better hurry).

Just a quick update on the navy tulip skirt. This morning I sat down and undid the waist and sewed the pleats for the top 10cm and dropped the front waist a little (thanks Moushka - great idea!).

I think you'll agree it's a much better skirt now.

Thanks to all who have commented here and over at Pattern Review - you really helped me to stay motivated throughout this major project!

Sunday 22 November 2009

Wardrobe Comp Review - Cool, Calm & Cowl-necked top

Blah, no makeup and weekend hair but here goes anyway!

Pattern Description:
Deliciously simple top, designed for drapey knits with a stretchy rib trim...try rayon, cotton, bamboo or silk knits. Relaxed fit top has a drapey, shallow cowl with a cut on facing, and a gently scooped back neckline. Top features cut-on cap sleeves and a deep ribbed band at the hem; top finishes at the lower hip. Wear this great basic piece with your favourite jeans or pants for a fabulously simple but chic everyday or weekend look.

This pattern came around as a free download on a Hot Patterns newsletter. You can find it at fabric.com.

Pattern Sizing:
I cut a 12 around the top tapering out to a 14 for the bottom edge and band

Did it look like the photo/drawing on the pattern envelope once you were done sewing with it?
There is no photo - which I really would prefer when selecting a pattern. I think it looks more or less like it should, I thought the front neckline would be a little lower. I don't want to bring the girls out to play at work but I feel a bit like I'm being throttled in this one!

Were the instructions easy to follow?
Super-easy. The only vaguely tricky bit is folding back the facings at the shoulder seam so the seam is enclosed, but the directions for this are pretty good.

What did you particularly like or dislike about the pattern?
I like how it's a very simple design and would suit my drapey knit well. I don't like that it's a little high in the front for me. When you are a little bit busty a slightly lower top stops you from looking like your boobs grow out of your chin (or chins in my case lately!). I like the look of the band but wasn't sure it would work on a hippy girl. It looks okay but doesn't fit to my proportionally small waist like it should. It is also unbelievably long! I have a short waist which doesn't help but I ended up chopping 4 inches off the length (vertical, not around my hips) of the band. I still think it is not the best style for my body but I like it for a change and it is so comfy!

Fabric Used:
Polyester stretch that I picked up on the spur of the moment at my local Spotlight. It was marked at $12.99 per metre - which I would consider average - but at the counter I found out it was marked down to $6. Gotta love a bargain!

Pattern Alterations or any design changes you made:
I narrowed the upper back by an inch each side of the CB and a lucky thing too or it would be falling off my shoulders. I made the band shorter (less deep).

Would you sew it again? Would you recommend it to others?
You know I actually might. I think it would look great in some kind of glittery knit with dressy pants (although I would widen the front neck so it hangs just a smidge lower).

Conclusion:
Not bad for a free pattern and some bargain fabric!

Here's the back.

Monday 16 November 2009

Next lot of Outfits!

Hi all,
Here are the photos of the outfits I can make so far from the navy tulip skirt. If I look tired and pissed off in the photos it's because I am! I am in the middle of renovations at home, meaning my sewing room is currently a repository for all our crap. Between that and going away the weekend before last I haven't been able to sew a stitch in nearly three weeks. On the upside we have painted the formerly hideous bedroom and we are having a fabulous new wardrobe installed tomorrow - with custom storage - bliss!

I am super-stressed at work ATM and I usually rely on my sewing to help manage that - grrrr! The jacket is kicking my ass and I really just want to sit quietly for a few hours and work on it but I can't right now - plus I really need to get started on my last garment, the pants (I have one other completed garment I haven't posted yet).

I would really hate to stumble at this last hurdle and not complete the competition. I have hope that things will start to settle down in the next couple of days, so wish me luck!

Oh, and I just remembered I am going to see New Moon on Sunday so that will cheer me up if nothing else!

Rant over. Enjoy the photos...This skirt is wearable as is but doesn't give a great side view. I will definitely alter it (sew down the pleats and take it in a touch) but might not have time to do that before the end of the comp.

This one is a bad angle. I know my lower half is big but this is ridiculous!

I don't mind this look.

The camera flash makes this top look all kinds of wrong! But it looks nicer with navy than it would with black.
Can I express how happy I am with this blouse? I never would have made something like this if it weren't for the competition and I don't just love it, I am IN love with it.

Wardrobe Comp Review - Prima Tulip Skirt

Here is garment 7 for the wardrobe competition, a free pattern from the September 2009 Prima magazine. Prima is just your standard women's mag but I used to buy it regularly as there was always a sewing pattern in the middle. Then the patterns stopped so I didn't buy it for a long time. My Mum saw this one and told me about it, if the patterns are back I may start buying Prima again!

I have messed with the colour on this picture to try and show the pleats - they still don't show that well but my scanner is acting up and I can't scan the line drawing. The back view photo below is truer to colour.
Pattern Description:
Pegged skirt with deep pleats at the waist.

Pattern Sizing:
I cut a 16 according to my measurements, but it is a little roomy - I could have gone down a size, and I probably will take it in a smidge.

Did it look like the photo/drawing on the pattern envelope once you were done sewing with it?
Yes, it really does

Were the instructions easy to follow?
I didn't need them, it's just a basic skirt with some pleats at the waist. Anyone who can sew in a zip could make this.

What did you particularly like or dislike about the pattern?
I love that, for once, the pattern finishes just below my knee cap. Usually I have to lengthen everything so it will finish there. I think this is a cute style, it's quite 'fashion' but still grown up.

Fabric Used:
Polyester suiting. It was quite an inexpensive fabric as I didn't want to risk anything too 'good' on a style that might not work for me and probably won't be in fashion for much longer.

Pattern Alterations or any design changes you made:
I didn't alter the style at all but made several changes to the construction:

Note that seam allowances are included in this pattern,which makes changes a little more fiddly but not too bad, bear with me as I try to explain without visual aids...

  • I removed the hem allowance (3cm) and added a 1.5cm seam allowance onto the bottom edge. Then I traced off a hem facing rather than having to sew a pegged hem - which I can never do without puckering.
  • I overlayed the waist facing onto the front and back pattern pieces and used what was left below the facing to trace off a front and back lining pattern (adding 3cm to the top edge of the lining - 1.5cm seam allowance each for the lining and the facing).
  • When sewing, I just eased the remaining fullness on the lining pieces to the facing. This is a lot less bulky than two layers of pleats.
  • I stabilised the waist edge with selvedge cut from silk organza (applied after making the pleats), it still droops a bit from the weight of the pleats but at least it won't stretch out.

    Would you sew it again? Would you recommend it to others?
    Yes, I would definitely consider making this again.

    Conclusion:
    I am surprised at how good this skirt looks. I usually avoid this kind of shape because it adds to the parts of me I don't really want to add to. I think the secret is the deep pleats that don't pull open (the facing and lining help keep them closed too). However I may still sew the top few cm of the pleats closed just for extra security.

Wednesday 4 November 2009

Wardrobe Comp Review - Simplicity 2659

So this is garment number 6 (I think) of my wardrobe. Note that the pants in this photo are not part of the plan, I just wore them so you can see how the tunic will look untucked.

Pattern Description:
Misses & Miss Petite Dress, Tunic, Cropped Trousers, Shorts and Bolero.

Pattern Sizing:
I cut a 12, adding a little to the side seams below the waist.

Did it look like the photo/drawing on the pattern envelope once you were done sewing with it?
Yes, for the most part - I don't think my pleats sit as nicely as they do on the model. Here they are close up.

Were the instructions easy to follow?
Yes, this was a very straightforward pattern and the pieces fit together nicely without having to resort to 'gentle persuasion'.

What did you particularly like or dislike about the pattern?
When I first saw this pattern the unusual pleats really attracted me. I was a bit surprised no one had reviewed it yet. When I looked even closer the exposed zip really appealed. I saw the look around last summer and didn't like it at first, but it grew on me.

Fabric Used:
Ivory cotton dobby that has been in my stash for donkey's years!

Pattern Alterations or any design changes you made:
I added at the side seams to accommodate my hips. I didn't do an fba but the armholes feel a little snug so maybe I should have. I narrowed out the upper back as I normally would.

I couldn't find a 'novelty zip' to suit anywhere, and I looked and looked (not online admittedly!). I really wanted metal teeth, and preferably gold, as IMHO the plastic chunkey zips look a bit naff. I ended up using a separating zip which I shortened from the top using instructions in a BWOF magazine. So the zip now extends to the bottom of the top and it goes on like a backwards jacket. I didn't want the tape on the outside so I just sewed it in like a normal open ended zip. I love how it looks like a metal spine down the back!

Would you sew it again? Would you recommend it to others?
Yes, I would probably make the dress version to wear on summer weekends, and I would consider making the tunic in an evening fabric if the occasion arose - but it's a bit too distinctive to make another work top the same.

Conclusion:
This is a very cute top and it looks good tucked into a skirt or over pants.